CPUs made by Intel and AMD are physically different, so I have included separate instructions for each.
If you haven't done so already, you will need to Order Your CPU Processor
How to Install an AMD CPU Processor Chip
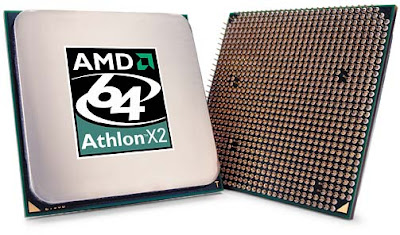
Your processor should look very similar to the picture above. Remember to follow the anti-static precautions when handling it!Before installing your processor, you may want to consult the user manual that came with your motherboard for additional instructions.
You will be installing the processor into the white square labeled Socket AM2 Connector in the upper middle part of the picture. First you will need to raise the metal arm lever on the side of the square by lifting up on the unattached end. Notice that two of the socket's corners do not have holes. Now look at the underside of the processor chip and you will see that two of the corners do not have pins.
Turn the processor chip over so the pins face down. Align the two corners without pins to correspond with the two corners of the socket without holes. You should now be able to gently insert the chip into the socket. Do not push or force it. The chip should just drop into place without any effort. Check to confirm the chip is evenly inserted into the socket all around without any gaps. Now you can gently lower the lever arm to lock the processor chip into the socket.
How to Install an Intel CPU Processor Chip
Your processor should look very similar to the picture above. Remember to follow the anti-static precautions when handling it!You will be installing the CPU in the Socket 775 connector as shown in the picture. If the motherboard has a plastic cover on the socket you will need to remove that first. To open the socket you must unclip the handle on the side of the socket and raise it up. Now you can lift up the main cage to expose the socket. Do not touch the pins!
Place the processor over the socket such that the notches line up. There is also an arrow on the processor that lines up with the corner of the socket with diagonal pins. Once the CPU chip is lined up properly you can lower it into place, close the cage and clip the retaining handle down. This should take only a little force. If you encounter too much resistance you can double-check to make sure you inserted the processor chip correctly.
HTML Comment Box is loading comments...


